

Turn on the social media step
The request to connect social accounts is one step in your affiliate onboarding. To find it, go to Settings, open Affiliate portal, and select Onboarding. You’ll see the list of steps a new affiliate goes through, including one called Website & Socials.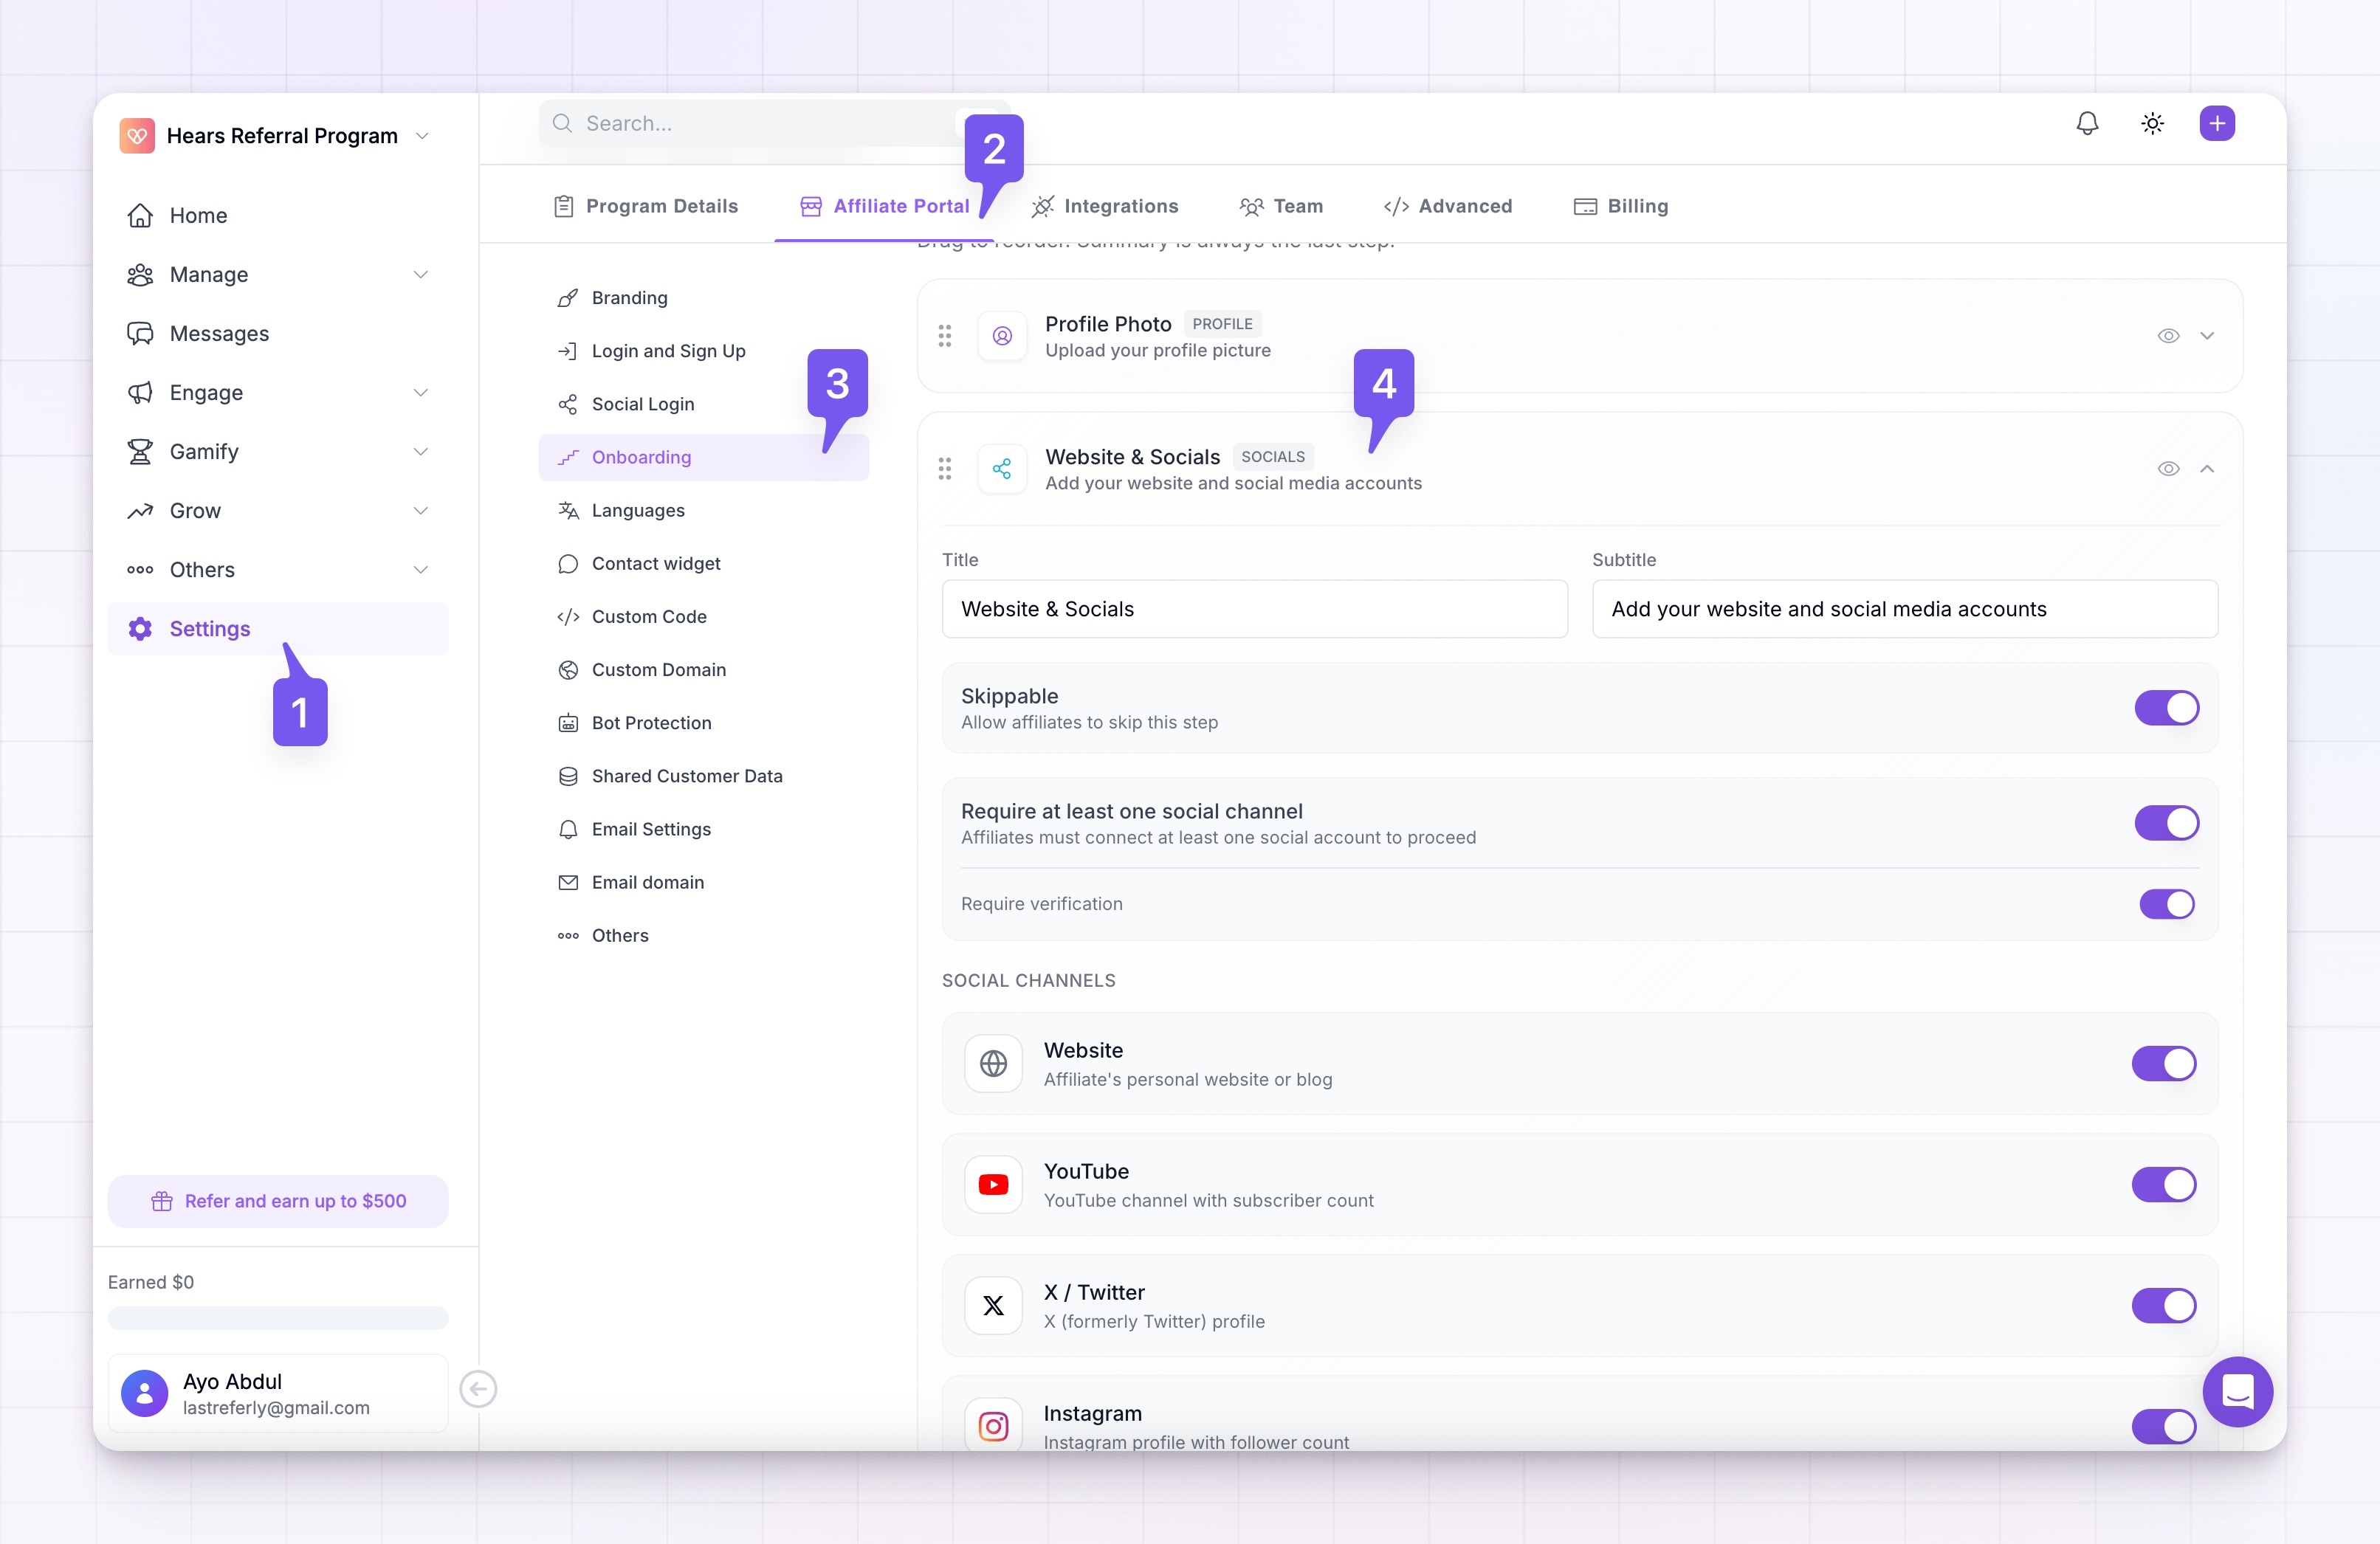 Each step has an eye icon to show or hide it. If Website & Socials shows a Hidden badge, select the eye icon to make it visible — affiliates won’t be asked to connect anything until the step is on. Select the step to expand it and reveal its options.
Two settings apply to the step as a whole:
Each step has an eye icon to show or hide it. If Website & Socials shows a Hidden badge, select the eye icon to make it visible — affiliates won’t be asked to connect anything until the step is on. Select the step to expand it and reveal its options.
Two settings apply to the step as a whole:
- Title and Subtitle — the heading and short line affiliates read at this step. The defaults (“Website & Socials”) work well, but you can reword them to fit your program.
- Skippable — when on, affiliates can move past this step without connecting anything. Turn it off if connecting an account should be part of finishing onboarding. Keep in mind that requiring a connection adds friction, so weigh how much you need the data against how many sign-ups you want to complete.
Choose which platforms affiliates can connect
Inside the step, Social Channels lists every platform an affiliate can add:- Website — the affiliate’s personal site or blog
- YouTube — channel with subscriber count
- X / Twitter — profile with follower count
- Instagram — profile with follower count
- TikTok — profile with follower count
- LinkedIn — professional profile
Decide what’s required
How strict the step is comes down to one toggle at the top: Require at least one social channel.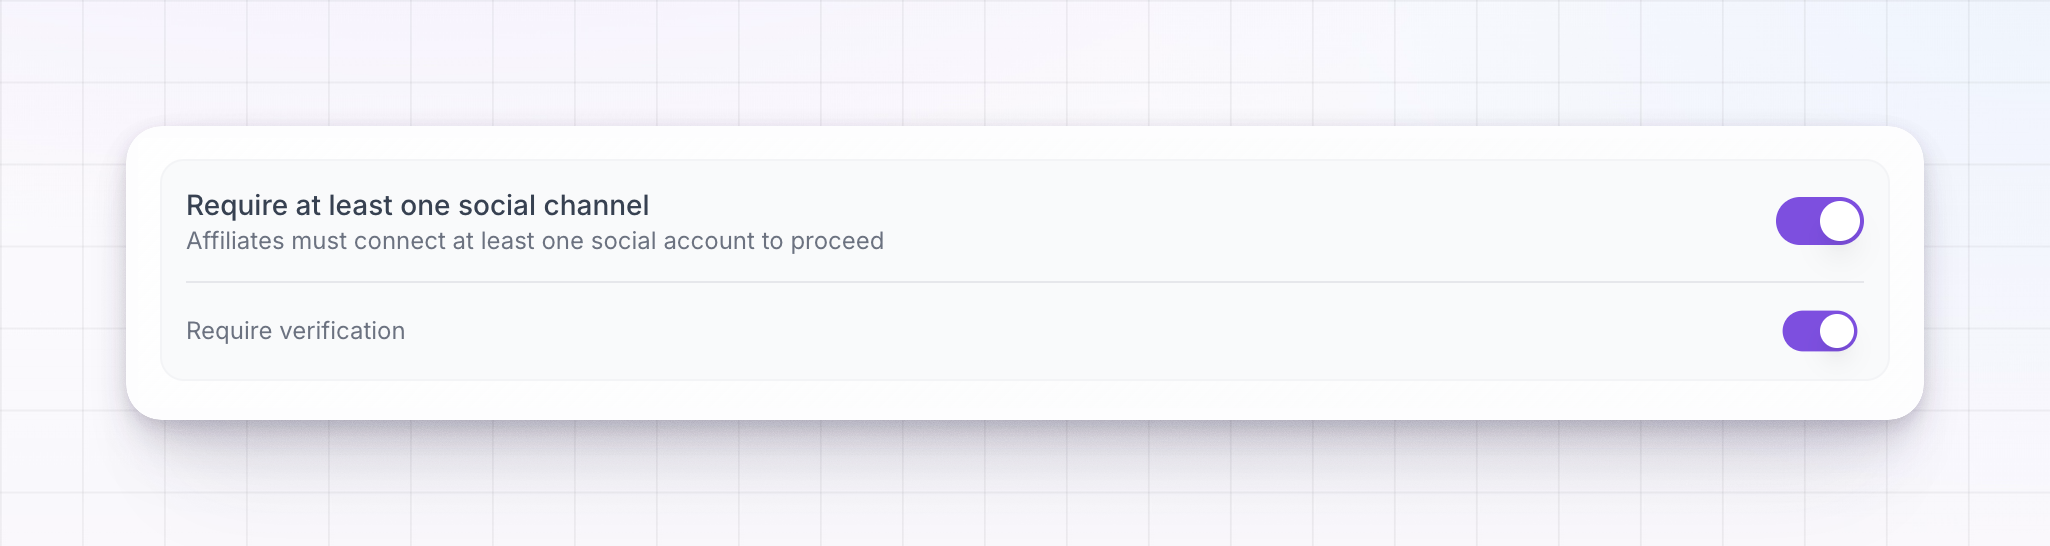
Ask for at least one account (the simple option)
With Require at least one social channel turned on, affiliates must connect at least one of your enabled platforms before they can finish onboarding, but they choose which one. This is the most common setup: you guarantee every affiliate hands over some audience data without forcing a specific network on someone who isn’t on it. When this is on, a single Require verification toggle appears beneath it. Turn it on to require that the account an affiliate connects is verified — that is, that they’ve proven they own it, not just typed in a handle. See What verification means below.Require specific platforms (the granular option)
Turn Require at least one social channel off and each enabled platform gains its own two toggles: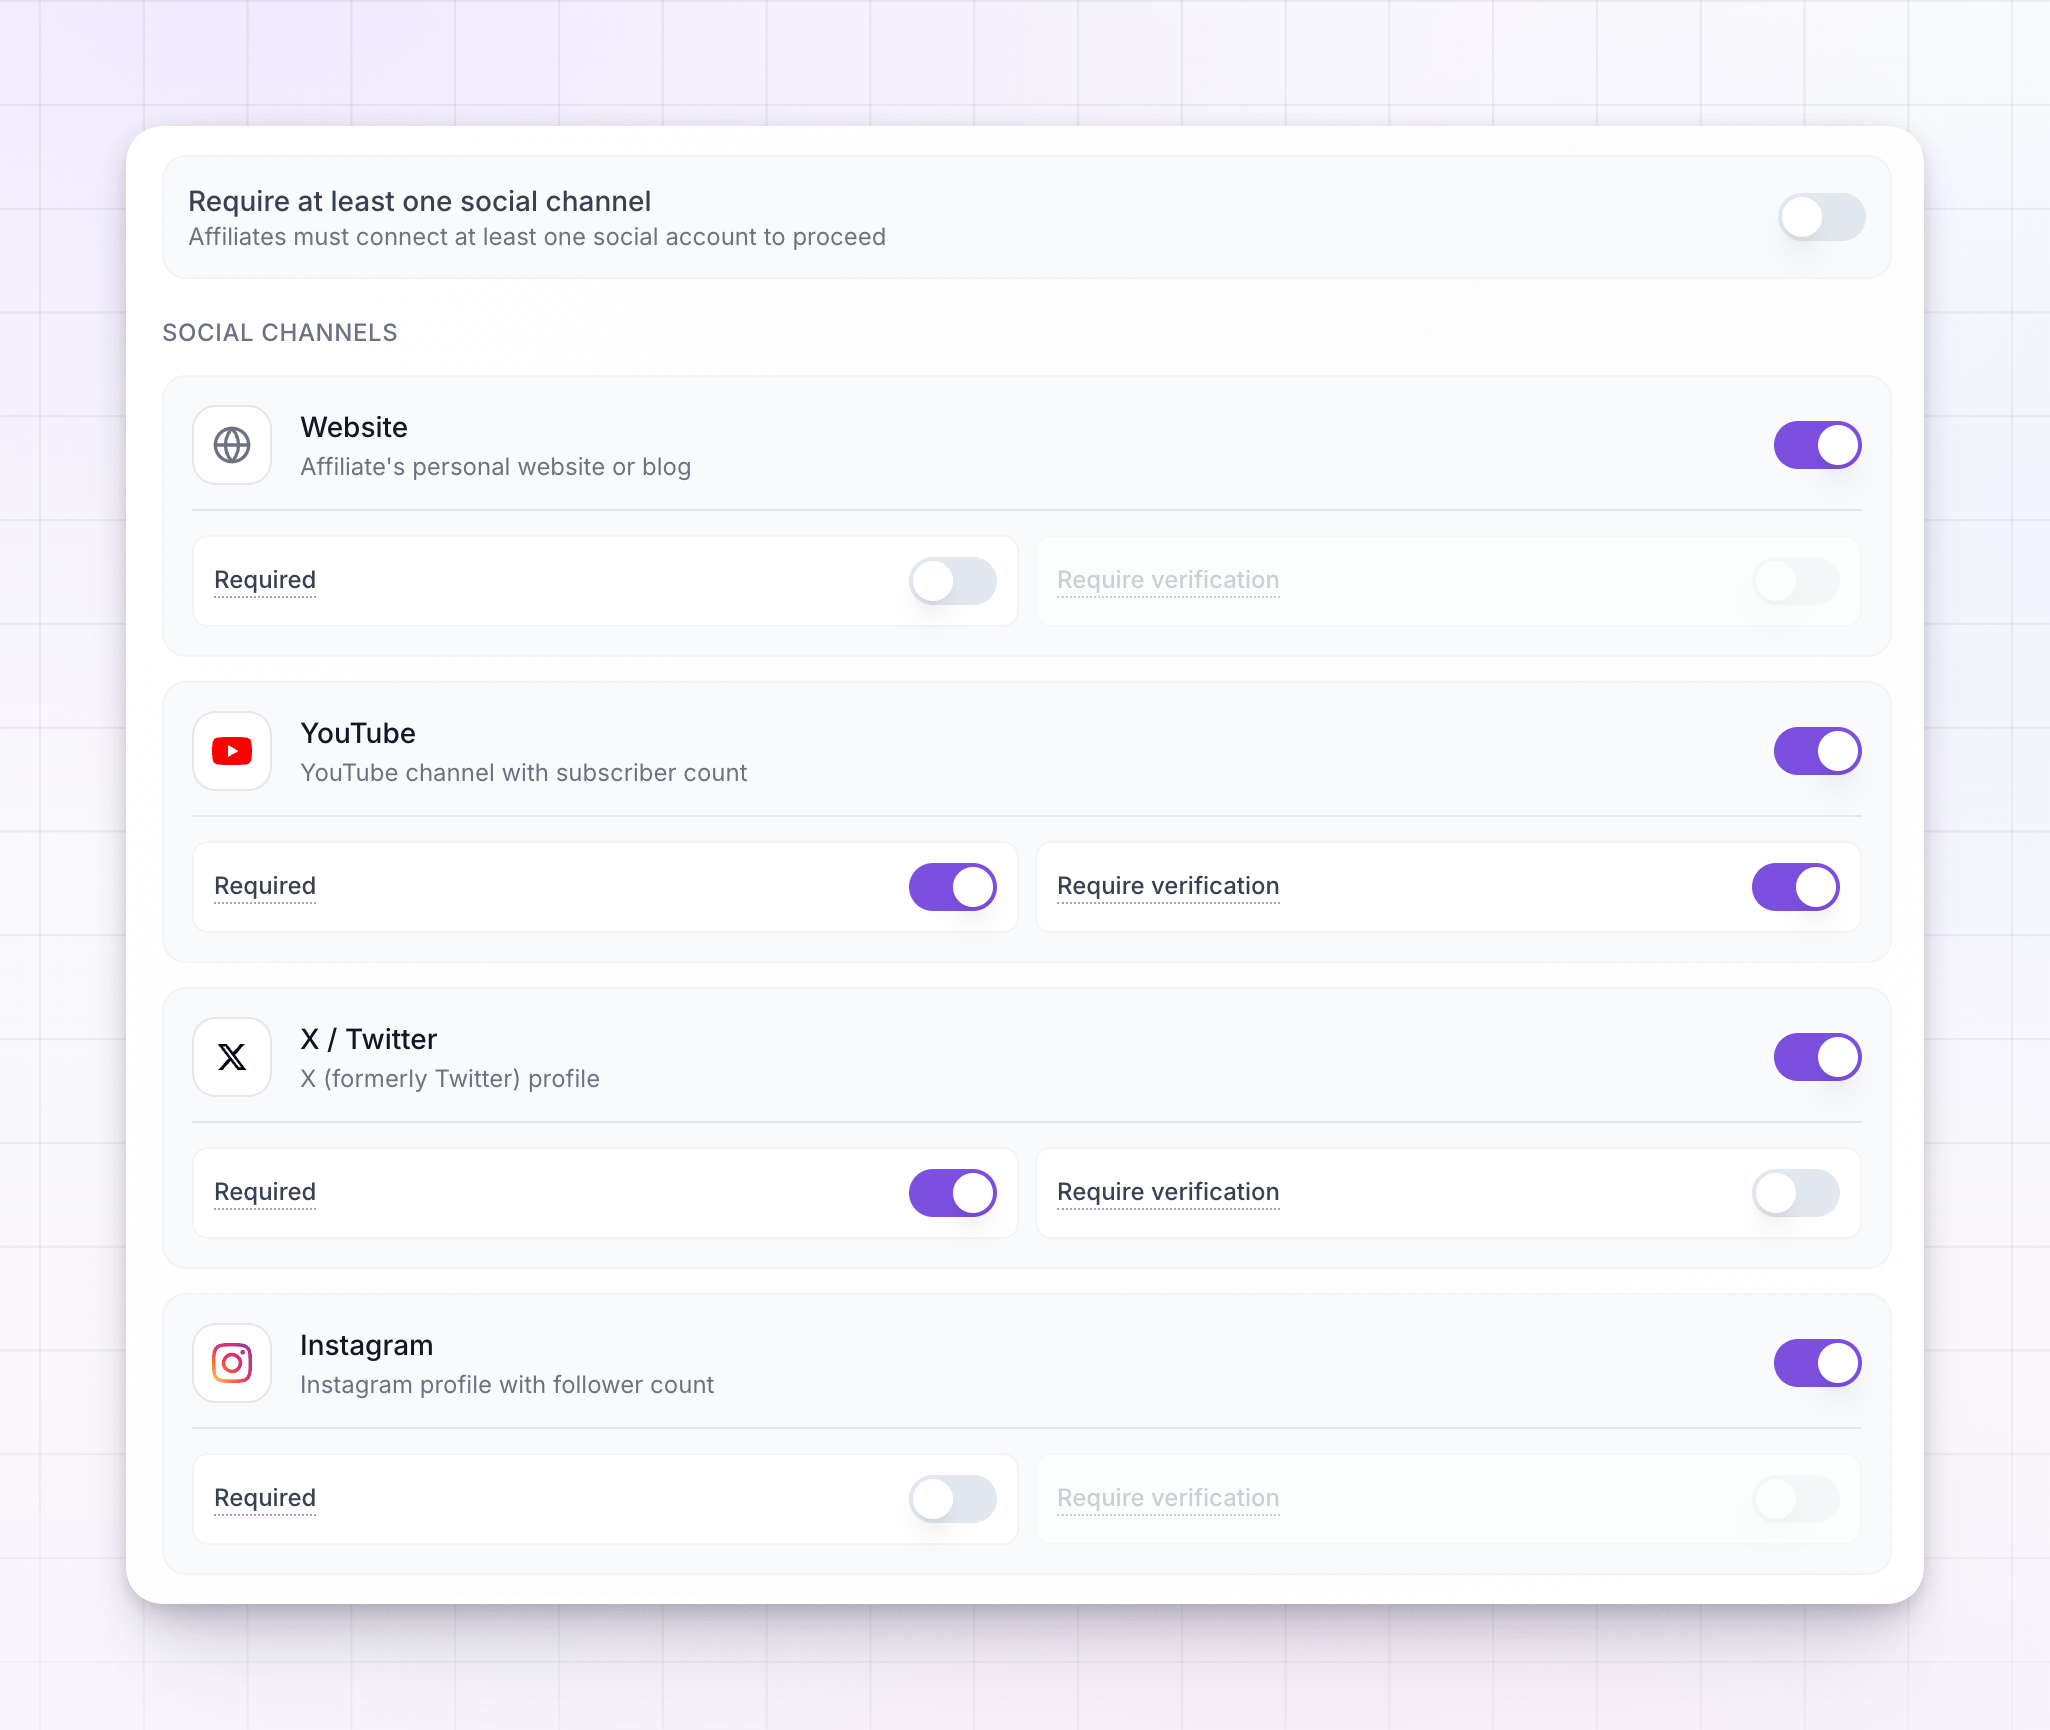
- Required — the affiliate must add this specific platform to continue. Use it when a particular network is essential to your program (for example, requiring Instagram for a beauty brand).
- Require verification — the affiliate must verify ownership of that platform, not just enter a handle. This becomes available once Required is on for that platform.
What verification means
Anyone can type a username into a form. Verification is how Referly confirms an affiliate genuinely owns the account they connected, so the follower counts and audience data you’re looking at are real. For most platforms, the affiliate verifies by signing in to that account and approving access — a quick, standard sign-in. A personal Instagram account is verified a little differently, by adding a short code to the profile bio. Either way, once an account is verified it earns a verified badge everywhere it appears in your dashboard, and only verified accounts show full audience insights. Requiring verification raises the quality of your data, but it also asks more of the affiliate. If you mainly want a rough sense of reach, asking for a connection without verification is lighter; if you’re making decisions based on the numbers, require verification.How affiliates connect and verify
Once the step is on, affiliates connect their accounts during onboarding, and can always add or update them later from their portal under Settings → Personal Info → Website & Socials.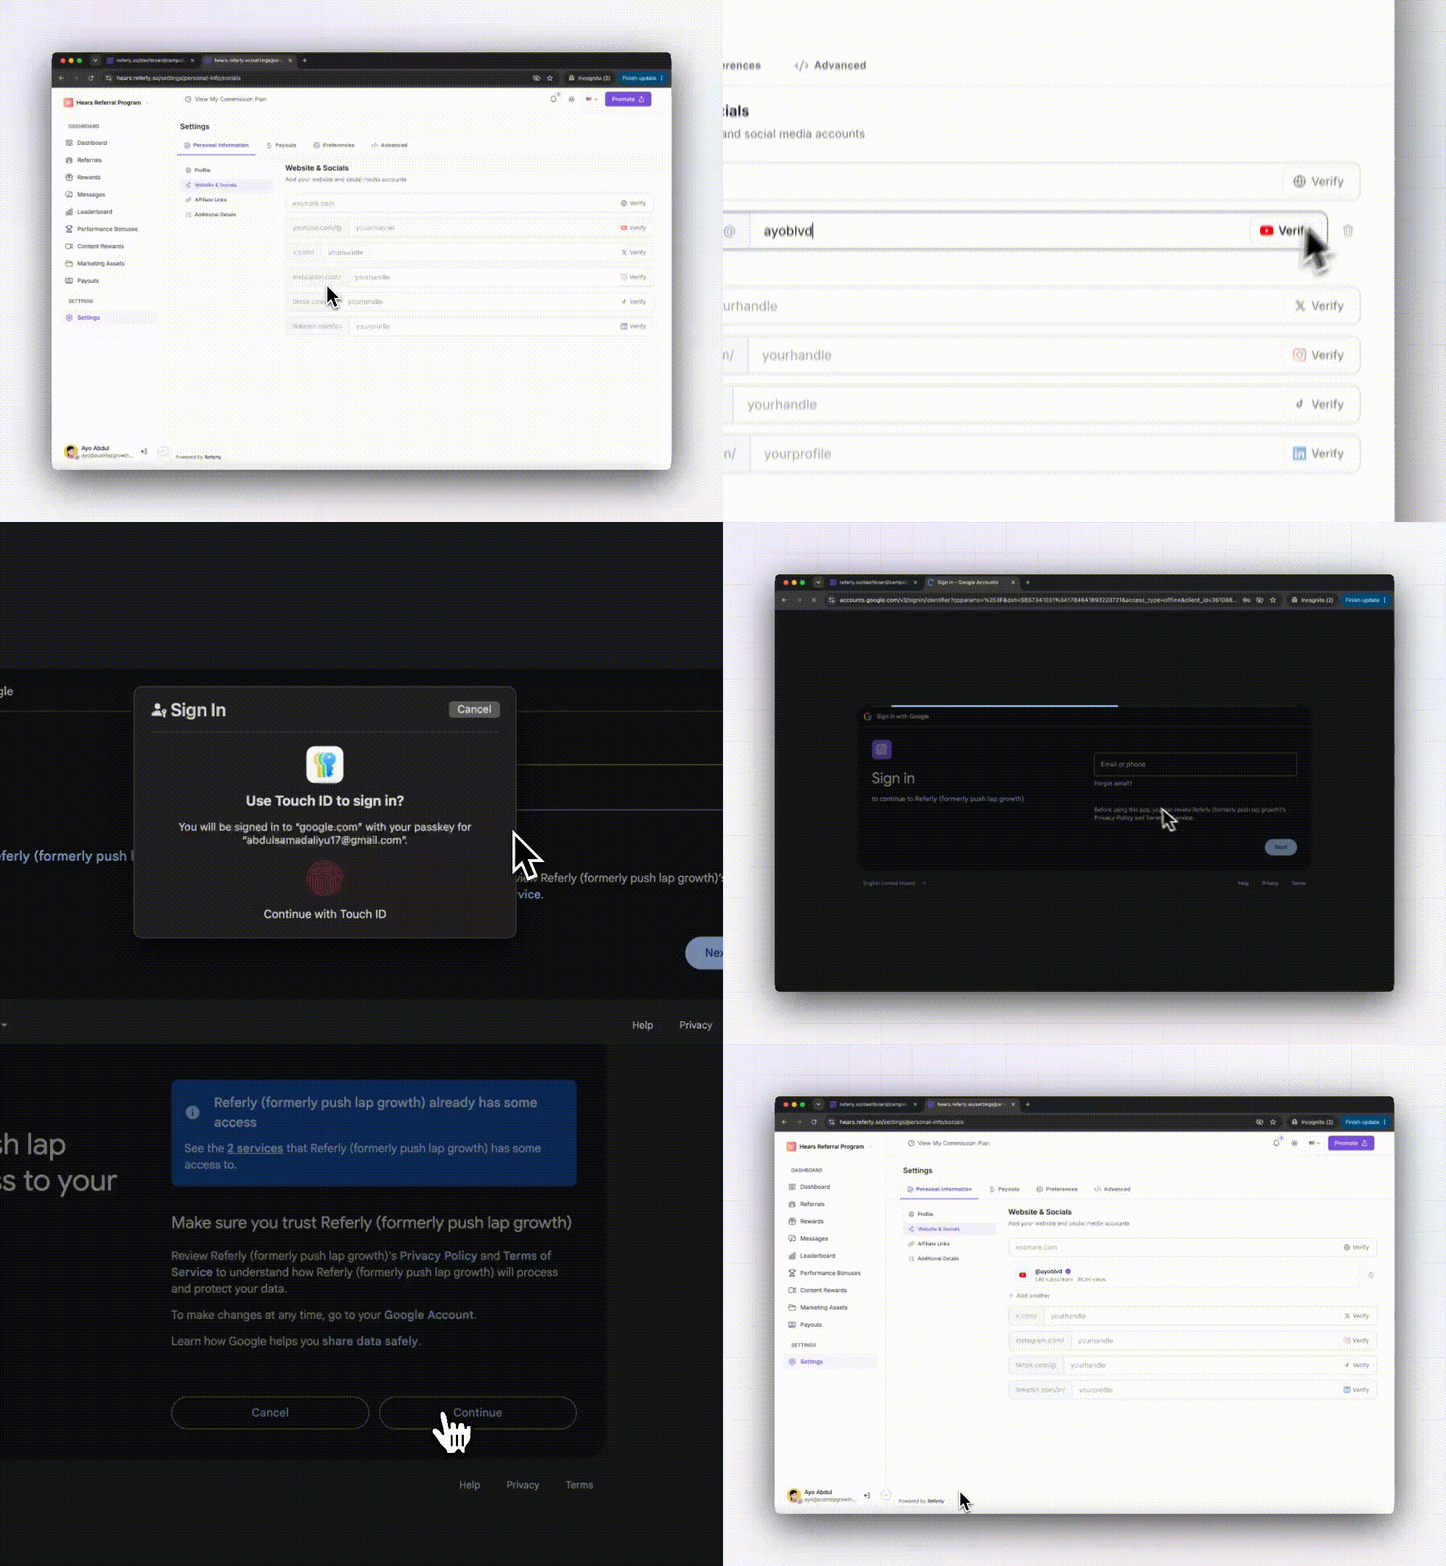 For the full walkthrough from the affiliate’s side — what they see, how each platform connects, and how verification works — point affiliates to these guides:
- Complete onboarding — the steps a program asks of a new affiliate, including connecting social accounts.
- Your profile — how affiliates add, verify, and update their website and social accounts after they’ve joined.
Filter and sort affiliates by platform and audience size
The reason to collect this data is to act on it. On your Affiliates list, connected accounts show up in the Social Channels column as platform chips with follower counts, and two filters let you cut the list down to exactly the affiliates you’re looking for. Select Filter above the list to open the filter menu.Filter by platform
Choose Social Platforms to narrow the list to affiliates who’ve connected a particular network. Pick TikTok to see only your TikTok creators, for instance. Hold Shift while selecting to choose more than one platform at once.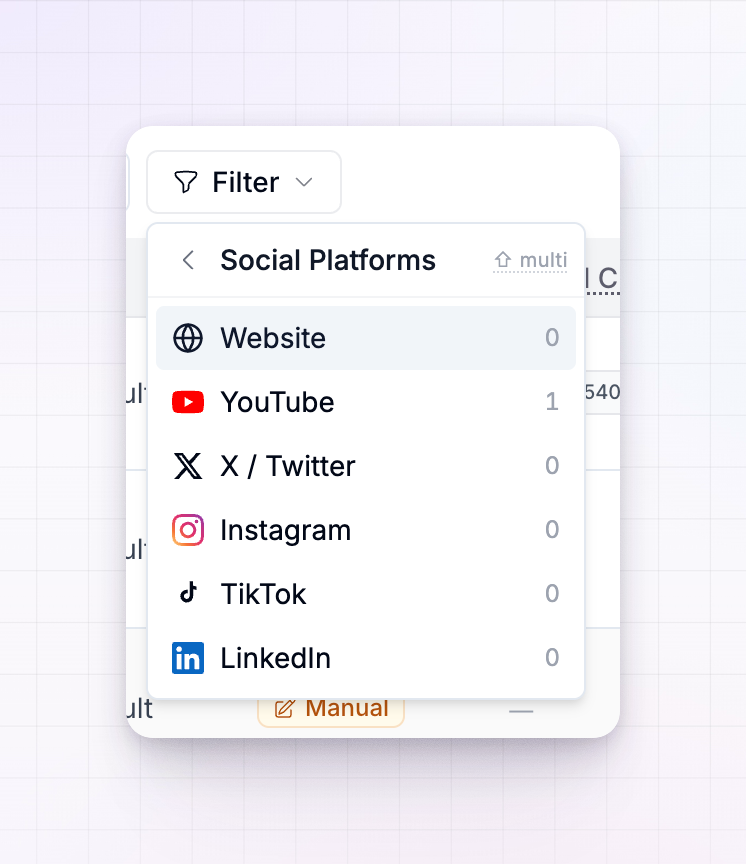
Filter by audience size
Choose Audience Size to filter by how large an affiliate’s following is. First pick a platform — All to add up an affiliate’s reach across every connected account, or a single platform to measure just that one — then set a Min and Max follower or subscriber count. Setting a minimum of 10,000 on Instagram, for example, surfaces only your larger Instagram creators.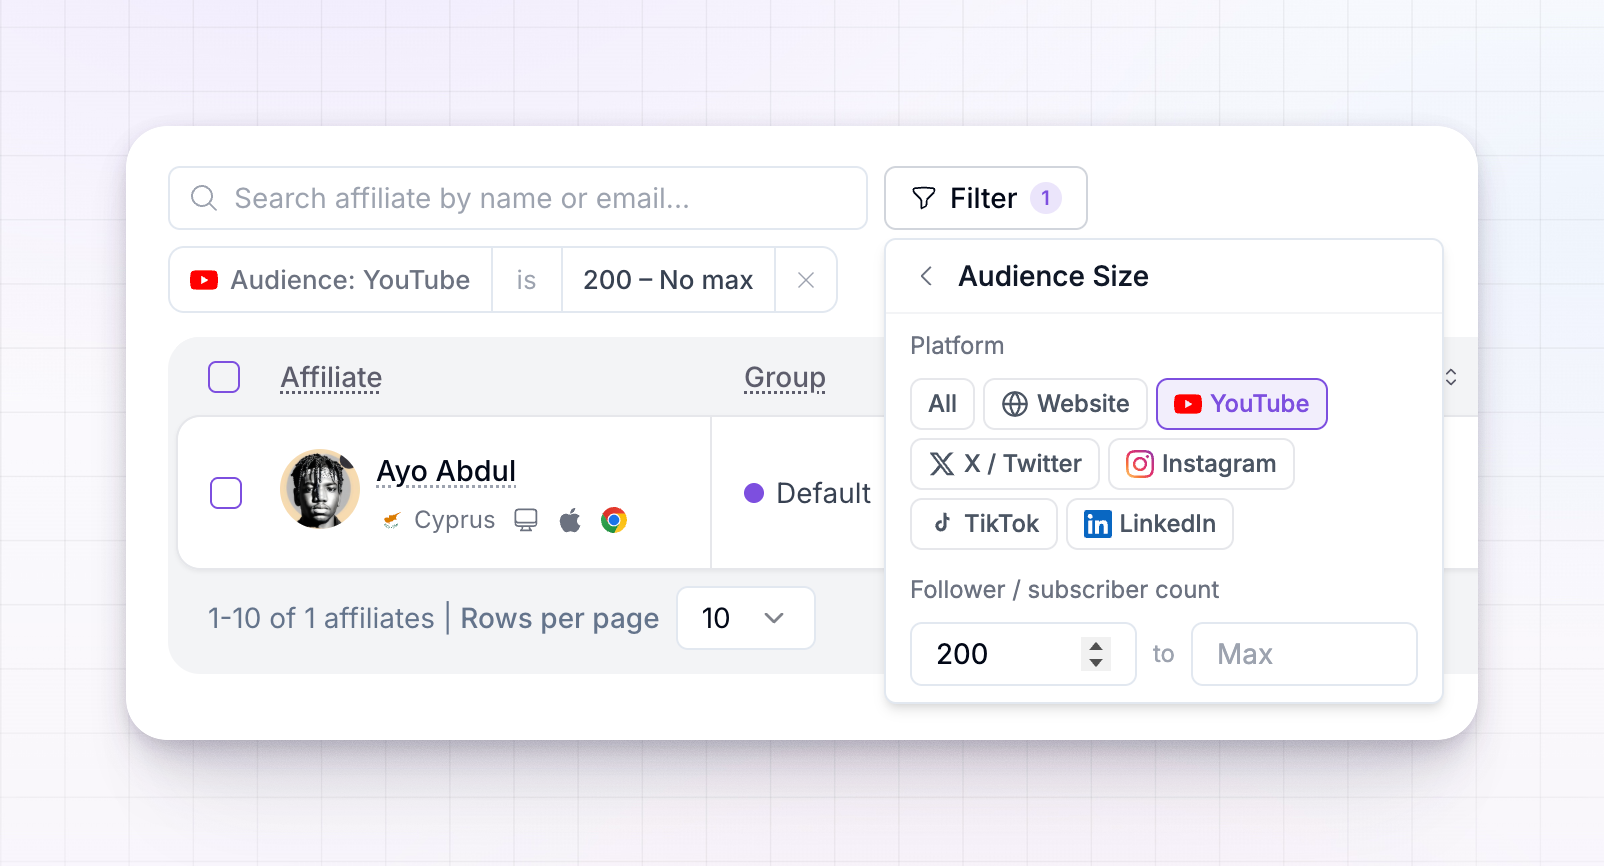 The two filters combine, so you can ask a precise question like “YouTube affiliates with at least 50,000 subscribers” in a few clicks.
Sort by reach
To rank affiliates from biggest audience to smallest, select the Social Channels column header and sort it — the list orders by audience size so your highest-reach affiliates rise to the top. You can also show or hide columns from the columns menu if you want the Social Channels column always in view. For more on shaping the list, see Filters and columns.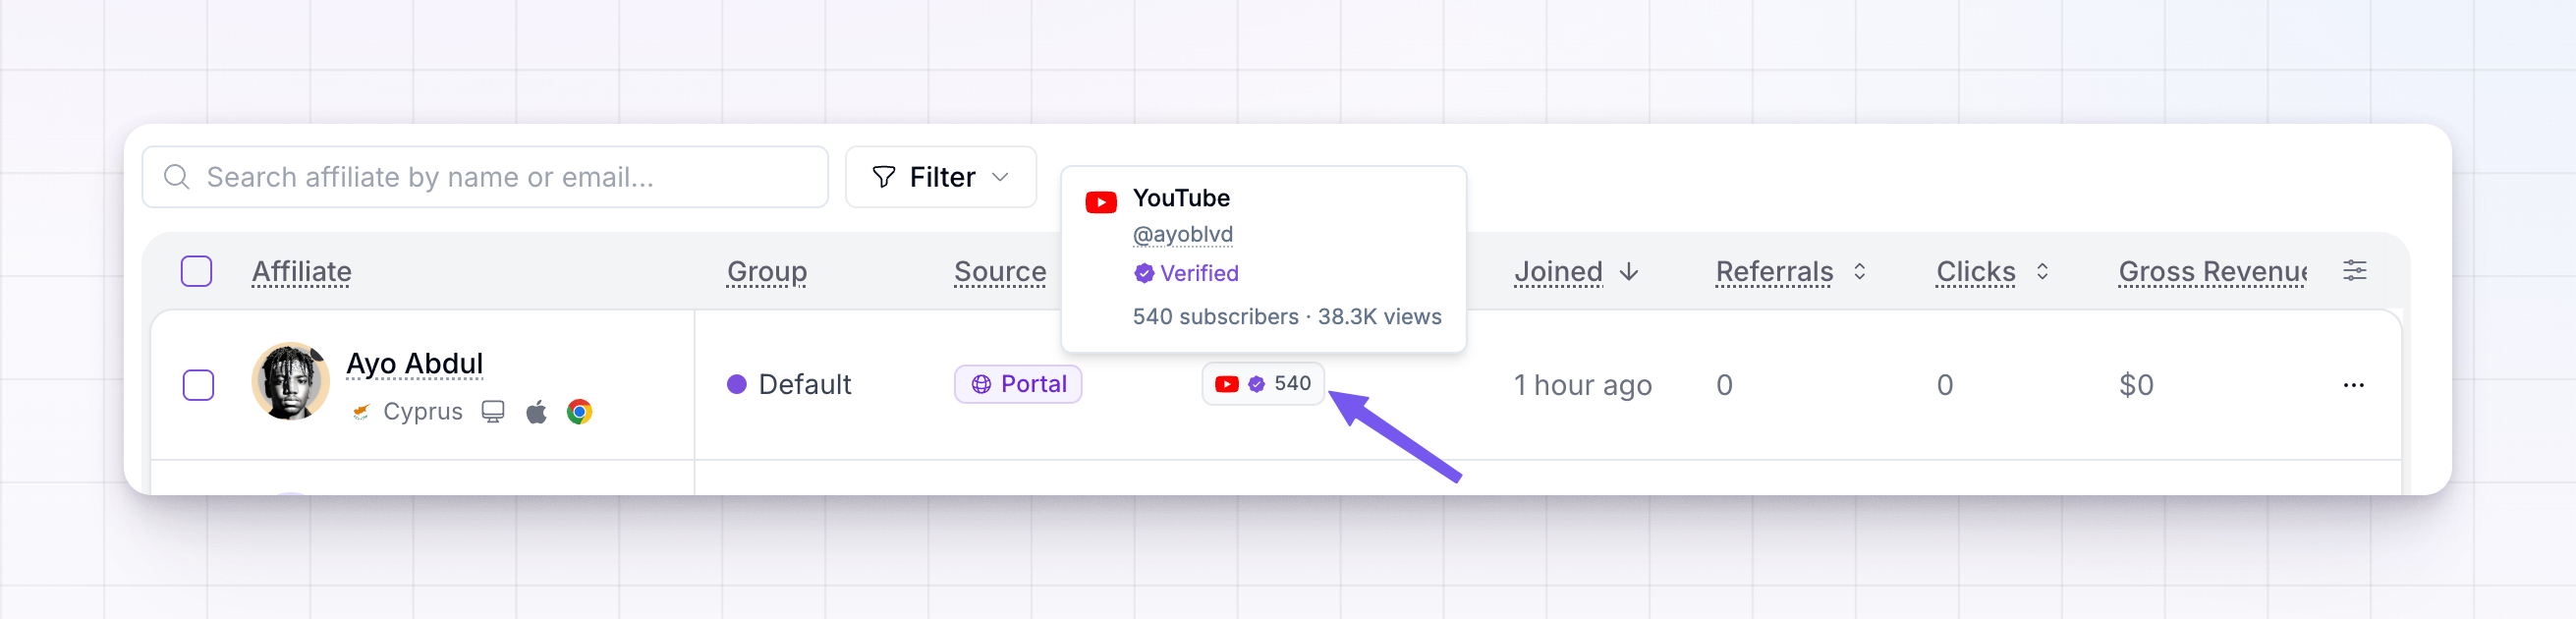
Read an affiliate’s audience data
Filtering tells you who has reach; the Audience tab tells you who that reach is. Open any affiliate from your list and select the Audience tab to see everything Referly has pulled from their connected accounts.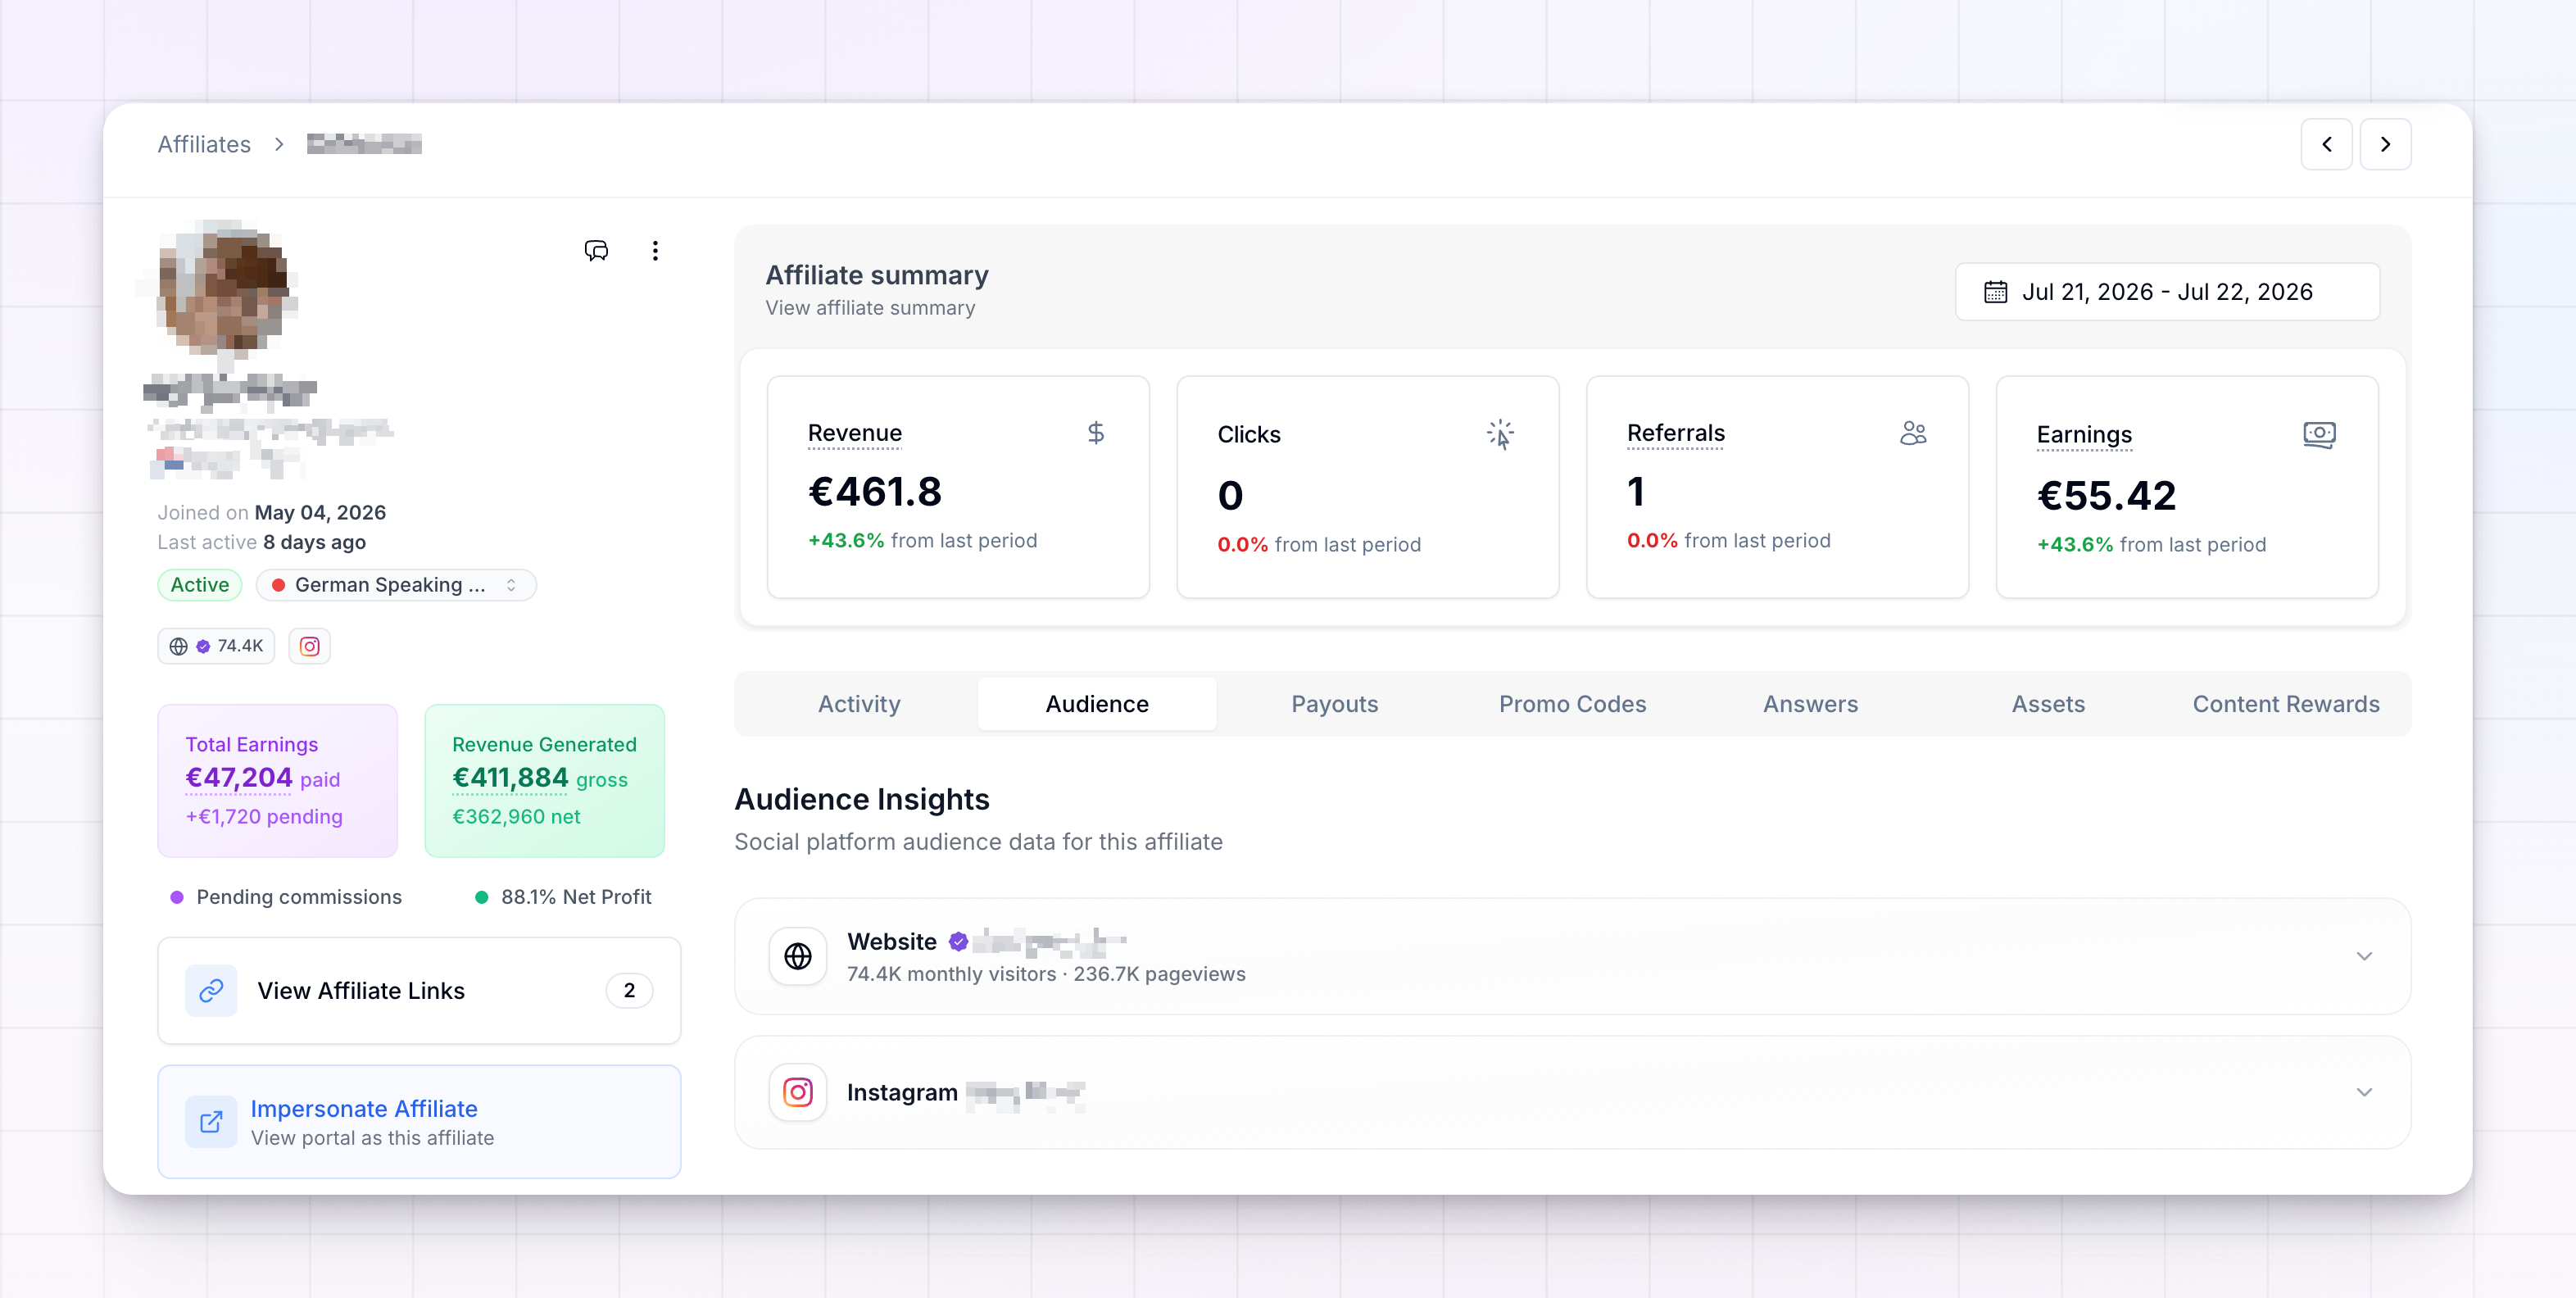 Each connected platform gets its own section. Depending on the platform, you’ll see:
- Headline stats — followers or subscribers, total views, posts or videos, likes, and following, shown as cards at the top of the platform’s section.
- Audience demographics — the age and gender split of the affiliate’s audience, for platforms that share it (YouTube and Instagram). Switch between the Gender and Age Group views to see how their audience breaks down.
- Geography — a world map of the affiliate’s top countries, so you can see whether their audience matches the markets you sell into. Instagram also surfaces top cities.
- Traffic sources and devices — for YouTube and a connected website, where the audience comes from (search, suggested, direct, social, and so on) and what devices they use.
- Website metrics — for a connected website, monthly visitors, sessions, pageviews, bounce rate, engagement rate, and average session length, pulled from the site’s analytics.
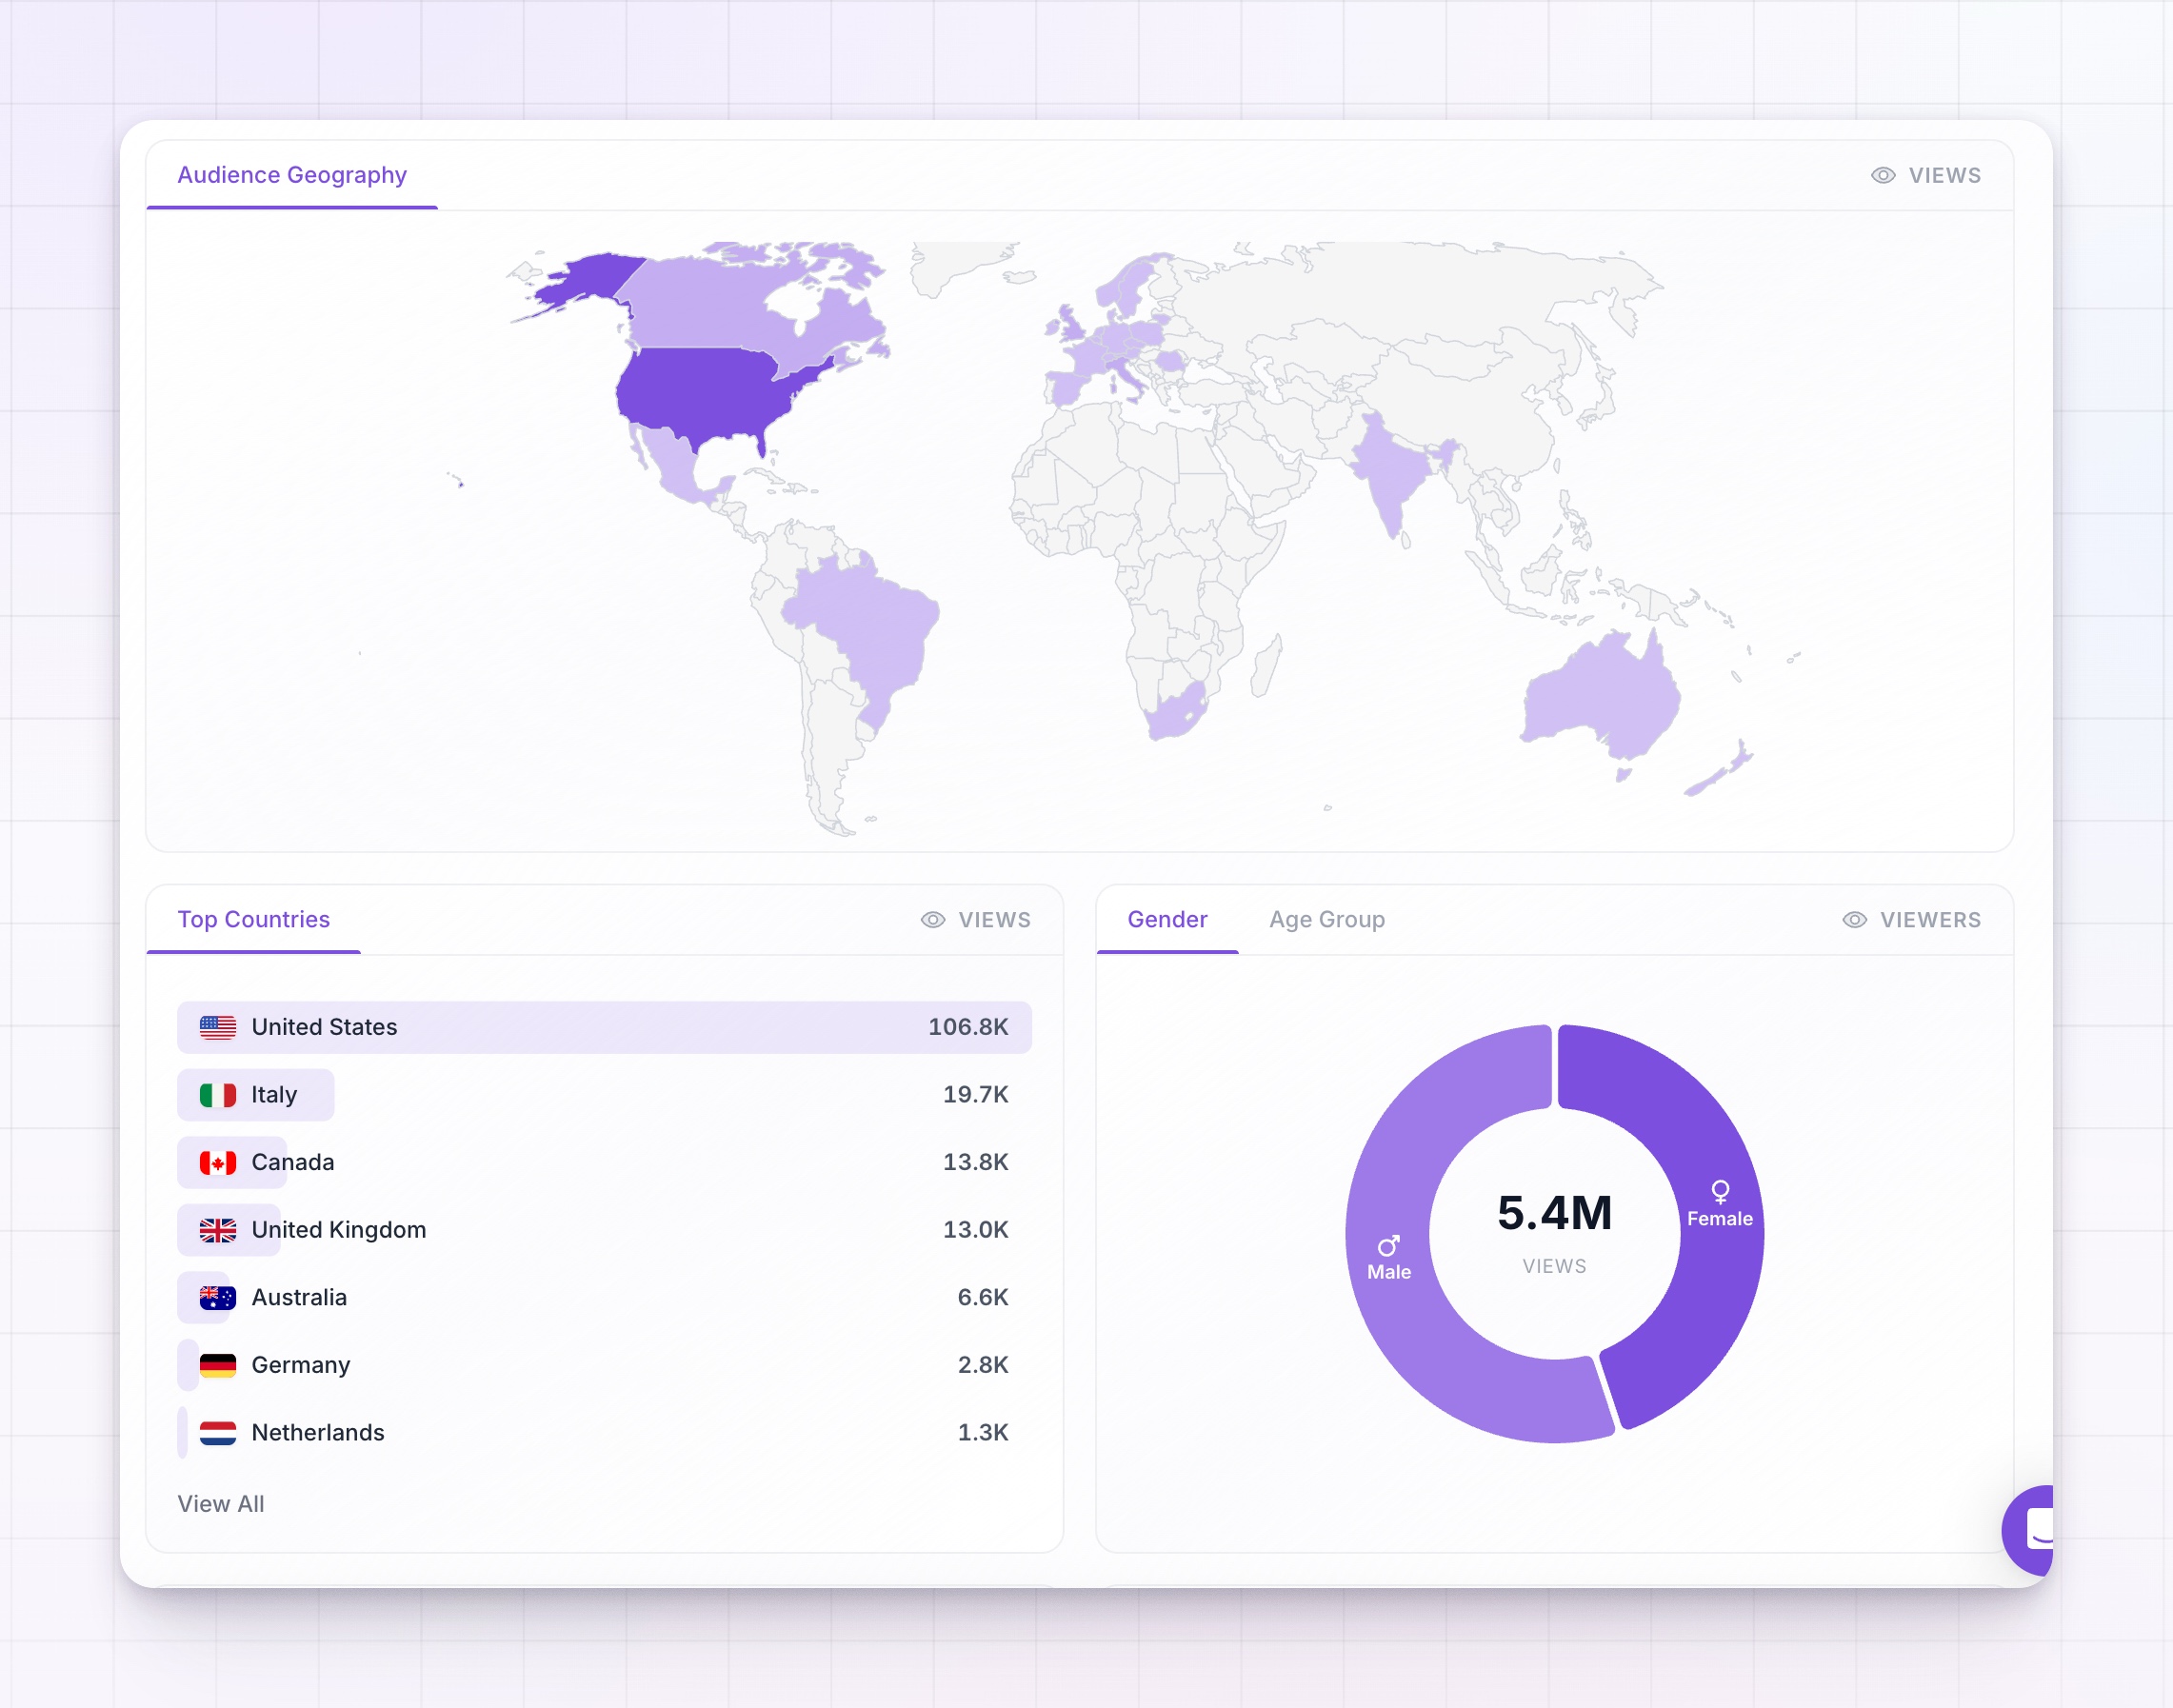
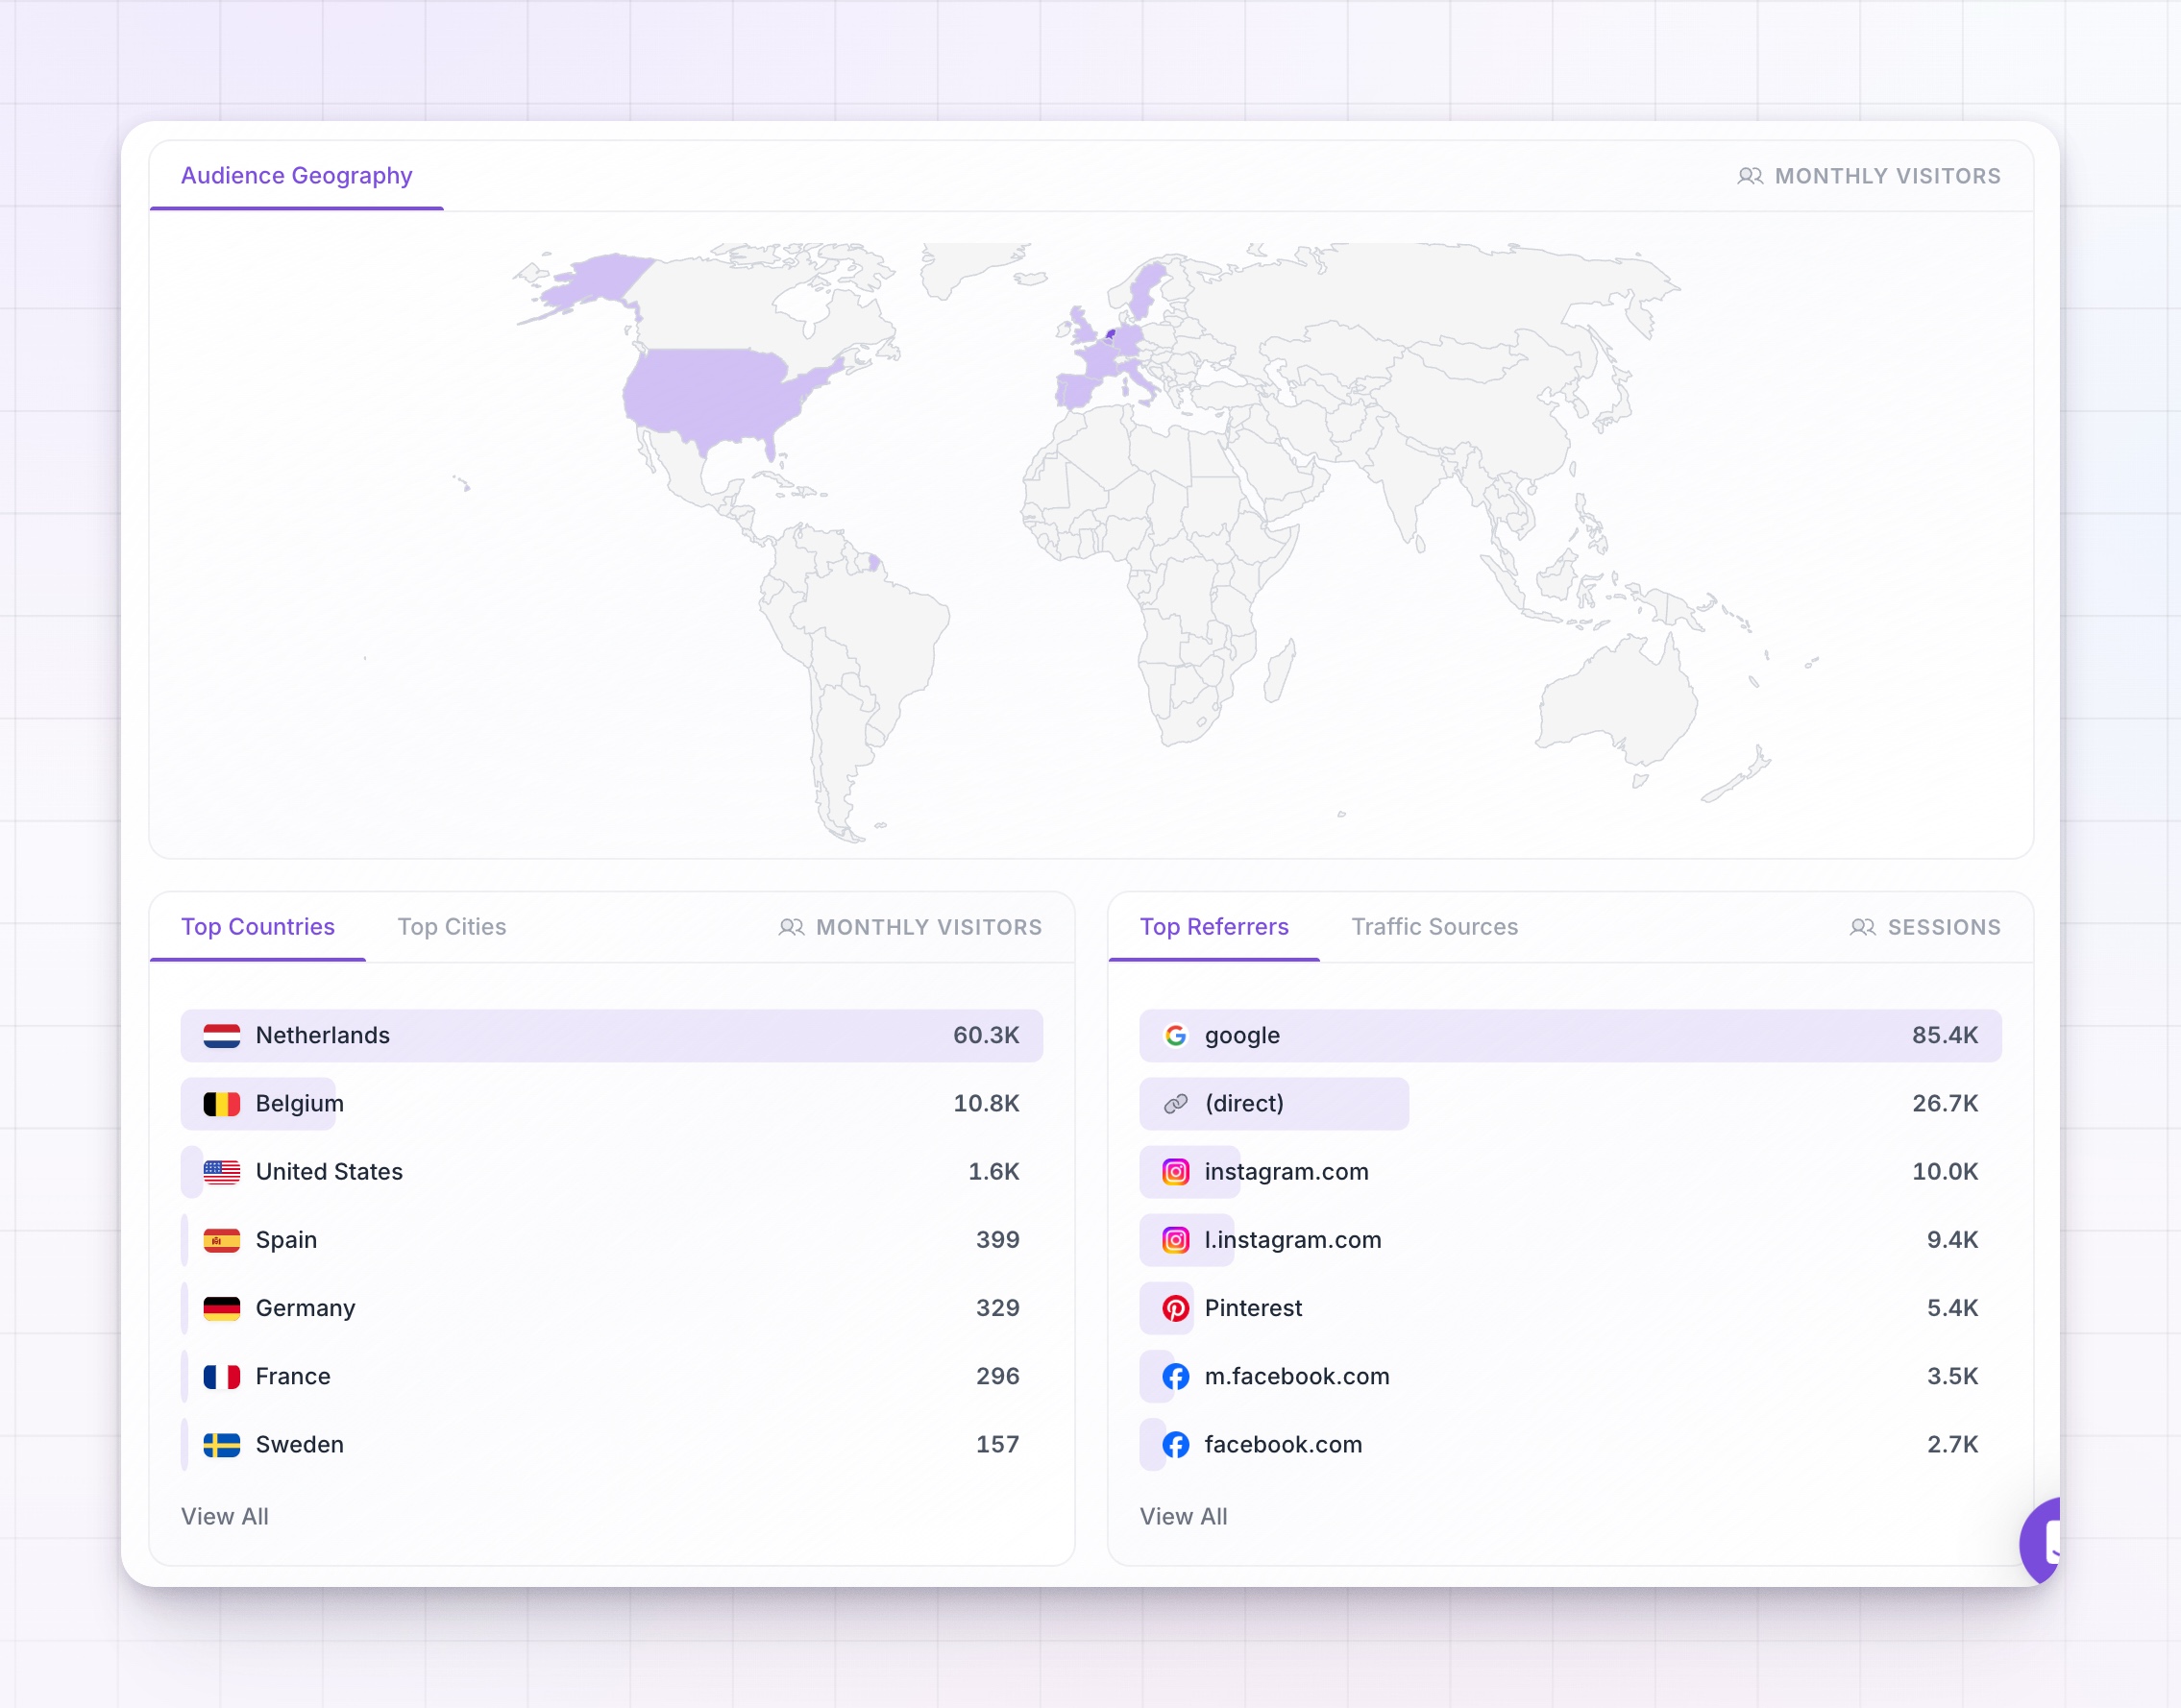 A couple of things to expect:
- Insights need a verified account. If an affiliate added a platform but hasn’t verified it, that section shows a prompt instead of data. The demographics and geography appear once they verify ownership.
- Small audiences may show less. Platforms hold back demographic breakdowns for accounts below a certain size to protect their users’ privacy, so a very small account may show follower counts but no age, gender, or country data. This is a platform rule, not a Referly limit.
Related
Customize your onboarding
Reorder steps, add custom questions, and shape everything a new affiliate sees.
Filters and columns
Narrow your affiliate list and choose which columns it shows.
The affiliate detail view
Read one affiliate’s activity, audience, payouts, and answers.
Complete onboarding
What affiliates see when they connect and verify their accounts.